 With Halloween just around the corner, there are certain techniques that are easy to learn to make that perfect for any boy or ghoul — um, girl. Each look is designed to be created in about twenty minutes for a Halloween makeup look that’s so quick and easy that it’s almost scary.
For each look you will need:
- Halloween Makeup Paint (This can be found for under $20 at Walmart, Party City, or the dollar store)
- A makeup sponge (This often comes with the Halloween Makeup Paint, but if it does not, sponges can be found at the same retailers for under $5)
- A large, soft makeup brush
- A flat makeup brush
- Baby powder
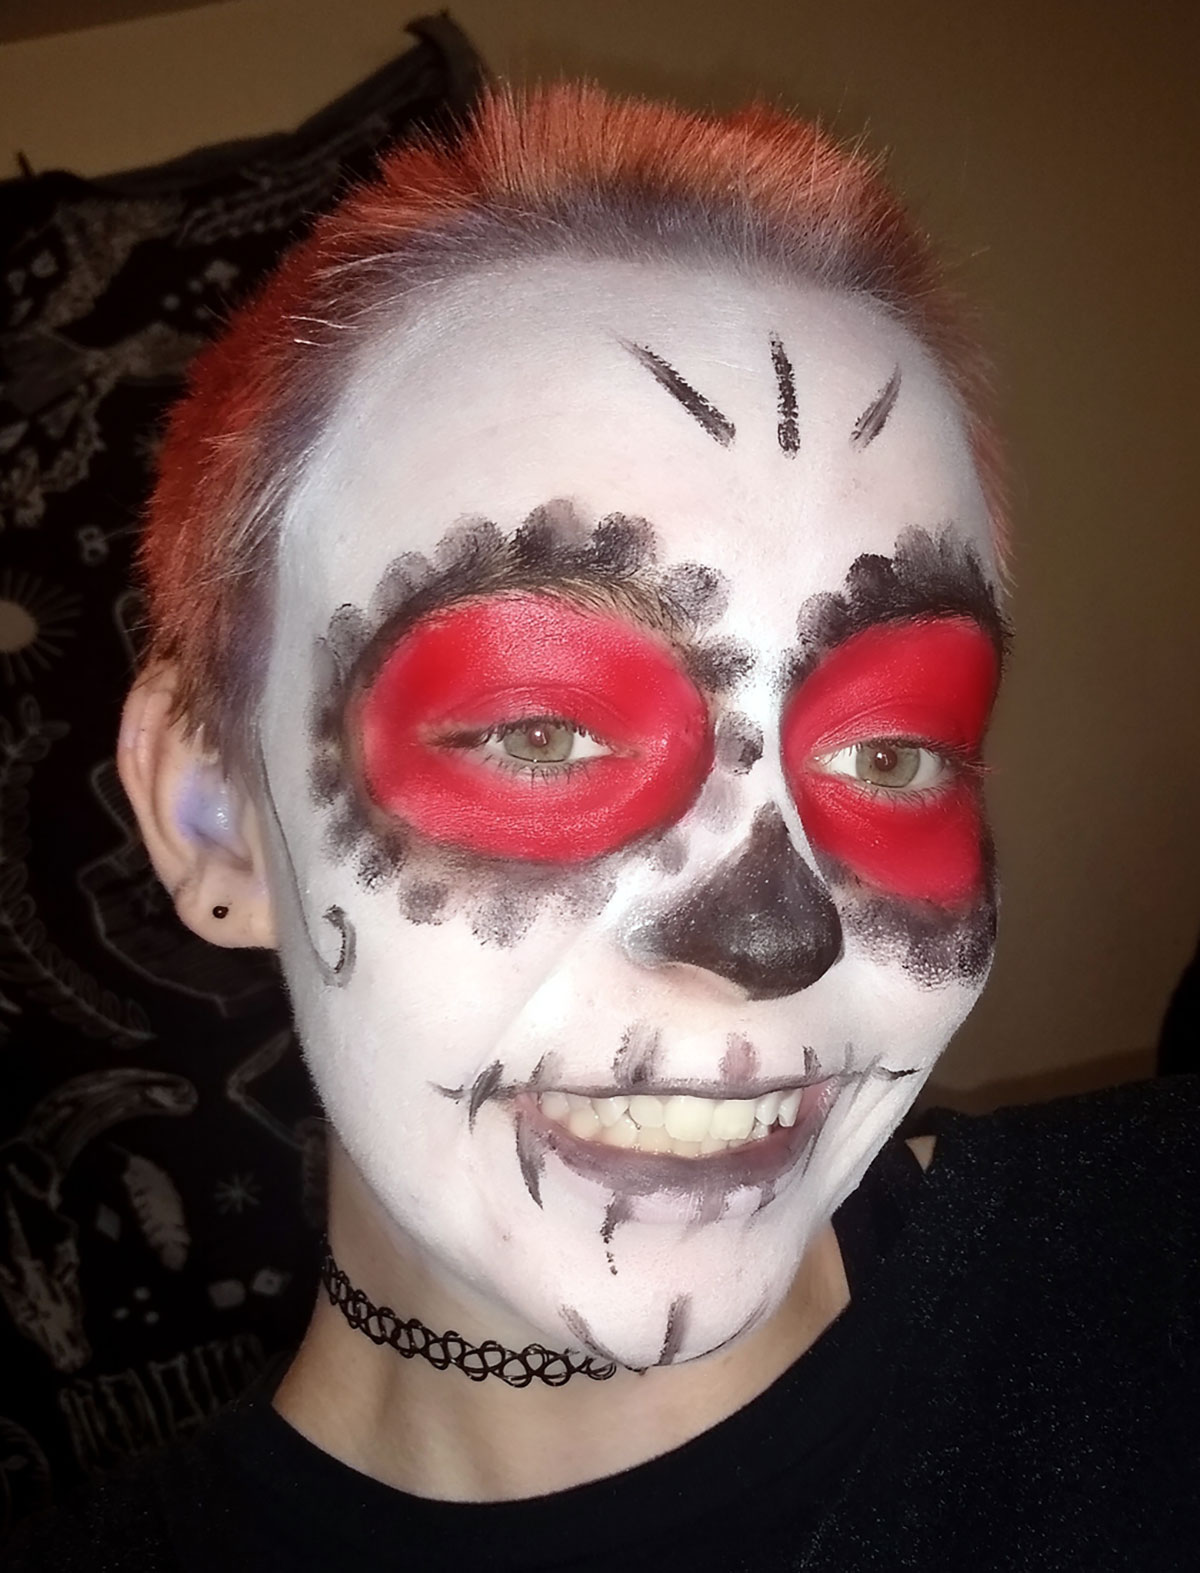
Sugar skull
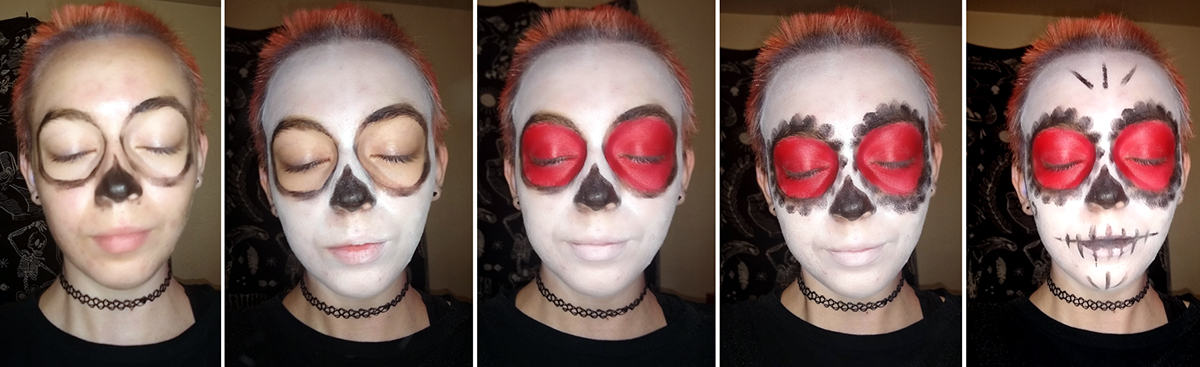
Step 1: Using a brush apply black paint to outline a circle around the eyes and create the nose of the skull.
Step 2: Gather a thick layer of white paint onto the sponge and swipe it across your face. You will be using a thicker layer because there will not be much paint on top of the white base, so you want the white to be very prominent. Once you apply the white paint, set it with baby powder using a thick, soft brush.
Step 3: Use the brush or your fingers to apply a color inside of the circles around the eyes. I used red paint, but any color works just fine.
Step 4: Use the brush or your fingers to create the flower petal effect around the circles of the eyes with black paint.
Step 5: Use the brush to apply details with the black paint
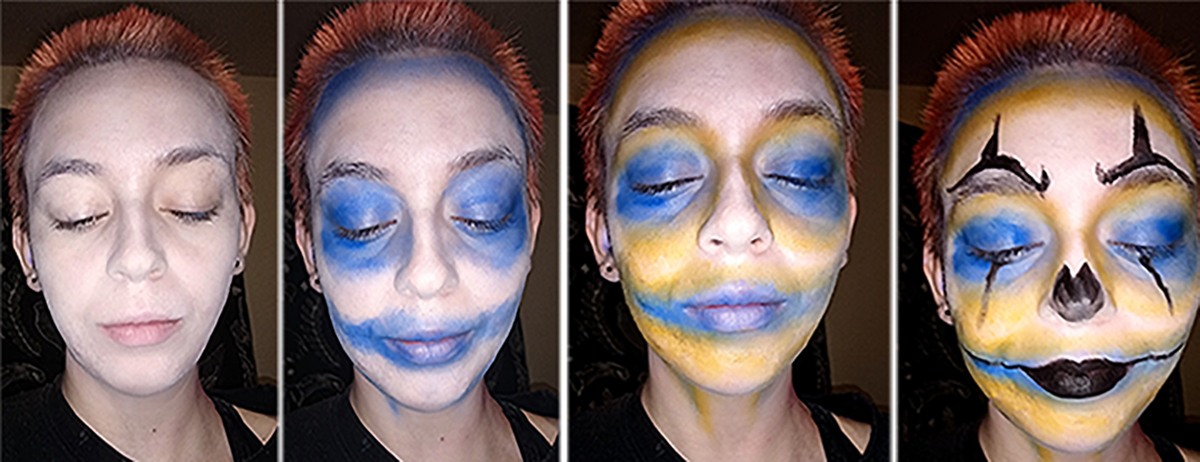
Clownin’ around
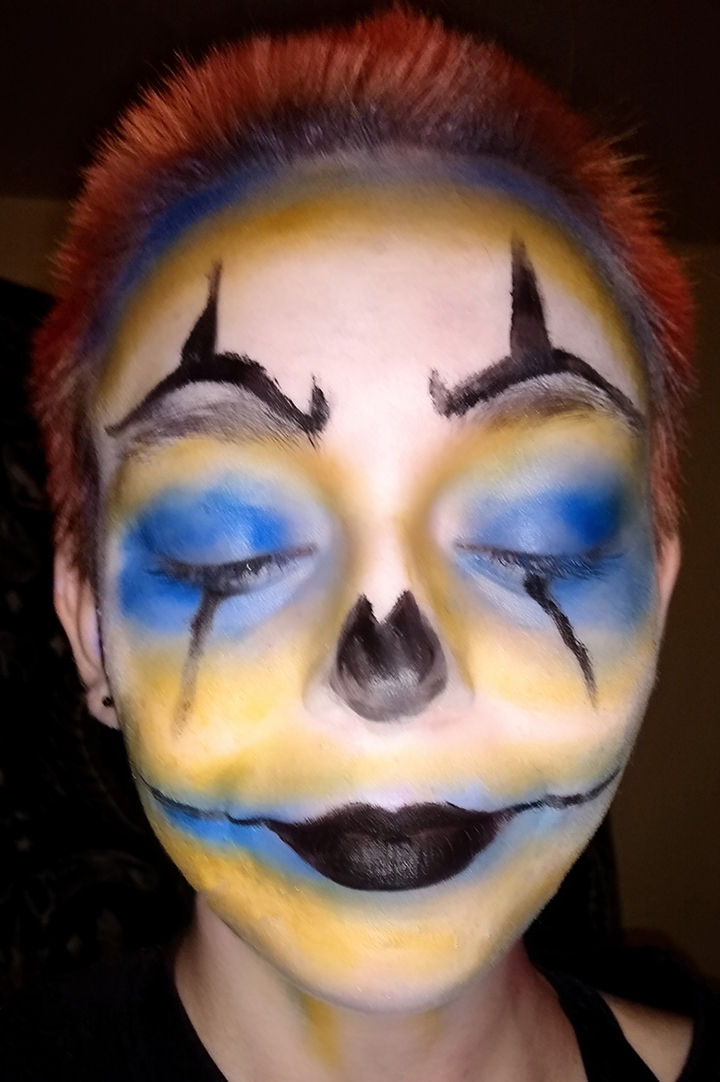 Step 1: Using a thin layer of white paint, use a sponge and gently swipe it across the entire face. You don’t want the paint to be too thick because there will be a lot of paint on top of this base. Once you have the white paint on, set it with some baby powder using a thick, soft brush.
Step 2: Take your first color (I used blue) onto your sponge and apply it around the eyes, lips, chin and forehead. Instead of swiping with the sponge, you want to dab the sponge against your face to create softer colors.
Step 3: Take your second color (I used a yellow-orange) onto the sponge and apply it over the first color. Again, dab the sponge to create softer colors. If the two colors seem really harsh, you may need to use your fingers to blend them together.
Step 4: Gather black paint onto your brush and apply it to the nose, lips, eyebrows and under the eyes. This is the step where the clown look truly comes together. If the black doesn’t transfer from the brush effectively, you can always use your fingers.