Lamar University Secure File Transfer
Login Page
LiquidFiles provides users a secure transfer system for sending, receiving, and sharing files. The system can be accessed through an online Webmail style interface or a plugin for desktop versions of Microsoft Outlook. Files can be shared with users inside or outside the campus.
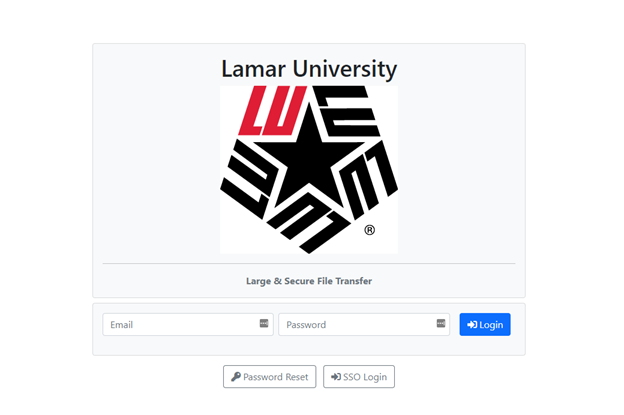
Campus Login Screen - [https://filetransfer.lamar.edu]
Users will access the application using the 'SSO Login' button shown above and entering their LEA credentials.
Sending Files
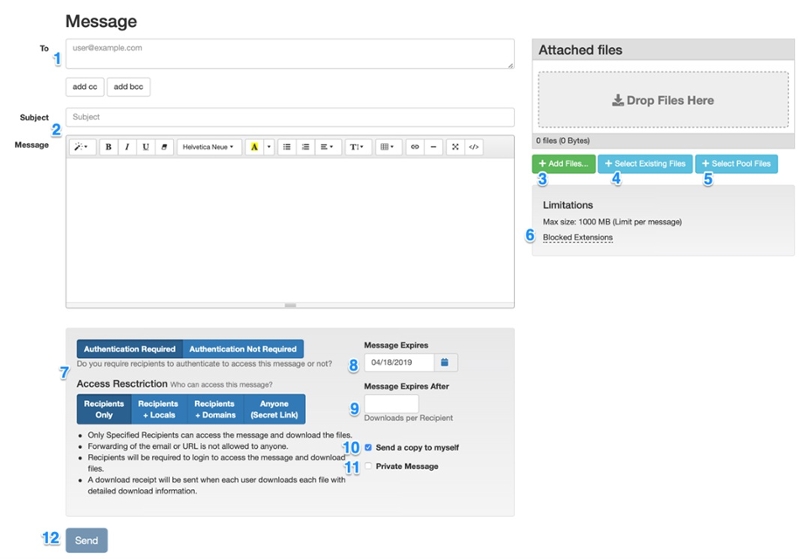
This is how the main compose window looks in LiquidFiles:
Steps to Follow
When sending files, these are the steps and options available:
- Select recipients in the same way as a web-based email system, please select To, CC and BCC email addresses to your recipients.
- Type the Subject and Message to your recipients.
- Add Files, you can add files up to the max size displayed in the limitations section 10).
- If you have sent any files previously, you can send them again without uploading them again.
- Pool files are files that an administrator can make available for groups of users that they send repeatedly, like a large companywide presentation and similar.
- Limitations — Message Size, Quota and File Extension Limitations.
- Select Authentication requirement and Access Restriction for your recipients. See the Access Permissions section for a complete description.
- The message expiration date. After this day, the attached files will be deleted.
- If set, each recipient can only download each file this number of times. Without the requirement to authenticate the download, each download by anyone is counted towards the limit.
- Send a copy to your own email address (for storage in your sent folder).
- A Private Message is a message where the Message is not included in the email sent to the recipients. When sending a Private Message:
- The recipients will get a generic email telling them to click on the link to view the message.
- You will get a read receipt when the recipient has viewed the message as well as when any attachments has been downloaded.
- You can send a Private Message without any attachments.
- It's not possible to send a Private Message with the permission that Anyone can download — sending a Private Message requires authentication.
- When you're ready, please hit Send. If uploads are taking a long time, you can check the checkbox to "send when uploads are done".
Access Permissions
| Permission | Authentication Required? |
Download Receipt | Description |
| Recipients Only | Yes | When each recipient downloads each file. | Only the recipients you have specified in the To, CC, and BCC fields will be able to download the file. It won't be possible to forward the email or message URL to anyone. |
| Recipients + Locals | Yes | When each recipient downloads each file. | In addition to the specified recipients, any files sent may also be downloaded by any local users on the system by forwarding the email or sending the message URL. |
| Recipients + Domains | Yes | When each recipient downloads each file. | In addition to the specified recipients, any files sent may also be downloaded by any recipient domain user. I.E., if you send to boss@company.com then secretary@company.com can also access the message, but not sneaky@competitor.com |
| Anyone (Secret Link) | Yes | When each recipient downloads each file. | Anyone may download the files. Use this option to post the Public Message URL in public forums, on web pages or anywhere where you want to make the files available. When the user visits the Public URL, they will be asked to authenticate by providing their email address and a confirmation. |
| Anyone (Secret Link) | No | Once per file, when someone has downloaded the file. | Anyone may download the files. Use this option when you don't want your recipients to have to authenticate to download the files. The downside is that since we don't authenticate the recipients, we don't know who downloaded what. |
Processing Uploaded Files
When large files are sent (with the HTML 5 method), they are split into 100 Mb blocks. All files are also scanned for viruses.
This can take some time on a busy system and the files are placed in a queue for reassembly and AV scan. As per the notice beneath the files, you don't have to wait for this to complete to send the message.
In the unlikely event of an infected file, the file will be automatically deleted before anyone can download the files.

Supported Browsers
The following browsers are supported for use with LiquidFiles:
- Microsoft Edge (v80+)
- Chrome
- Firefox
- Safari
Not Supported
The following browsers are NOT supported:
- Microsoft Edge Legacy (v18 and below) — will work in LiquidFiles v3.5 and below.
- Internet Explorer 10 & 11 — will work in LiquidFiles v3.5 and below.
- Internet Explorer 9 and earlier.
Receiving Files
When you have clicked Send, an email will be sent to your recipients. Depending on what system they use to read the email it will look a little bit different, and something like this:
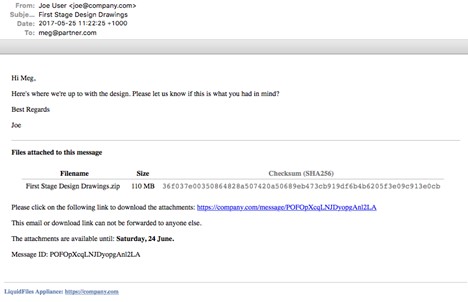
You will see:
- The email header with the To, From, Subject and so on at the top.
- The message typed in the message field in the compose window.
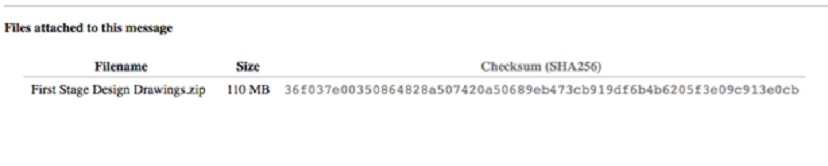
- The Files attached to the message header that begins the LiquidFiles added part.
- Each file sent is then listed together with the filename, file size and checksum.
- Beneath the files is the link the recipient will have to click to download the message.
- There is a notice if the email or download link can be forwarded to other users depending on the access permission settings when the message was sent.
- There's an expiration notice alerting the user when they will have to download the files by.
- And finally, there's a Message ID which is a unique ID that can be used when searching for this message in the LiquidFiles system.
A couple of things to note:
- There’re obviously no files attached directly in this email. All the files are store on the LiquidFiles system.
- When the message expires, the attachments will be automatically deleted. It's not possible to restore files that have been deleted.
Checksum
A checksum, or hash is a way to verify the integrity of the downloaded files, to verify that the download was successful.
It works by applying a cryptographic calculation on a file of any size and it will output a short checksum, or hash, that represents the message or file.
The trick with checksums or hashes is that every time they calculate the checksum for the same file, they will produce the same checksum. And if the file changes only one single bit, the calculation will produce a different checksum.
Receive a Message
When you receive a message from the LiquidFiles system, and it displays a checksum like:
36f037e00350864828a507420a50689eb473cb919df6b4b6205f3e09c913e0cb
You can use a Checksum Tool (software or Internet site) to calculate the checksum of the file you downloaded. LiquidFiles uses SHA-256 as its checksum function (sometimes referred to as SHA2-256).
If the checksum is the same, the file you have downloaded is identical to the one sent from the LiquidFiles system.
If the checksum is not the same, the file you downloaded is not the same as the one sent from the LiquidFiles system.
Example
So as an example, let’s say that we received a message with the following attachment:
We use a Windows application to calculate the checksum of the file we downloaded, selecting SHA2-256 as the checksum function (or hash type).
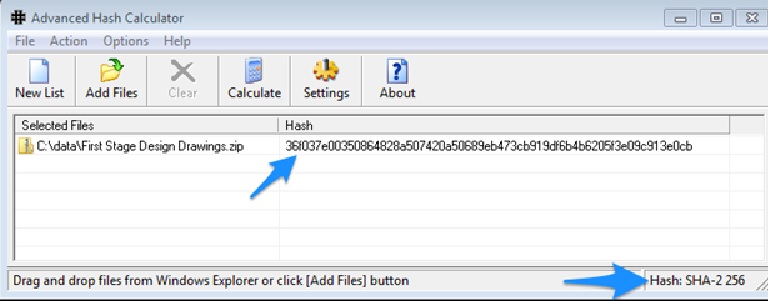
As you can see, the checksum in the message is the same as from the downloaded file. The file must be identical to the one on the LiquidFiles system.
Request Files
File Requests provides an easy way for you to request files from someone. The system will make it very easy so that there's no need to do any further explanation or walk someone through the process over the phone.
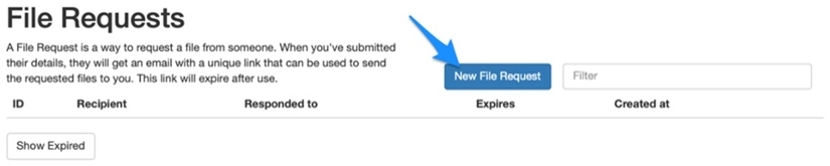
You Request the Files by clicking on the File Request button in the main menu bar.

This will open a page with a list of existing File Requests, if you’ve sent any previously. You can send a new File Request by clicking on the New File Request button.
This will open a new page that you can fill in like this:
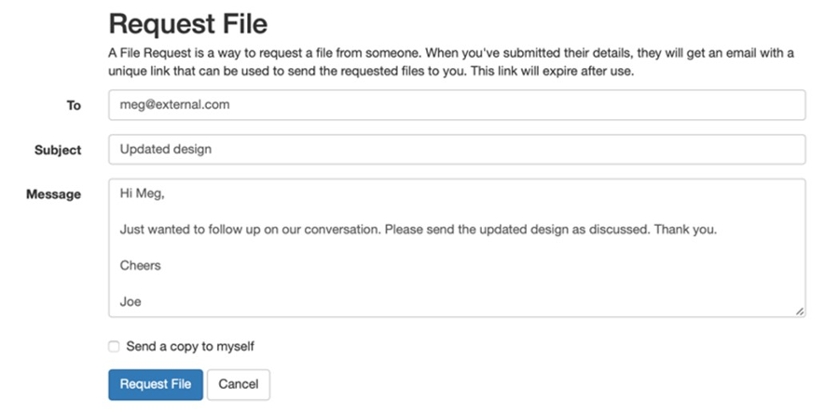
When you click on the Request File button, an email will be delivered (to meg@external.com in our example) with a unique File Request link. The email will look something like this:
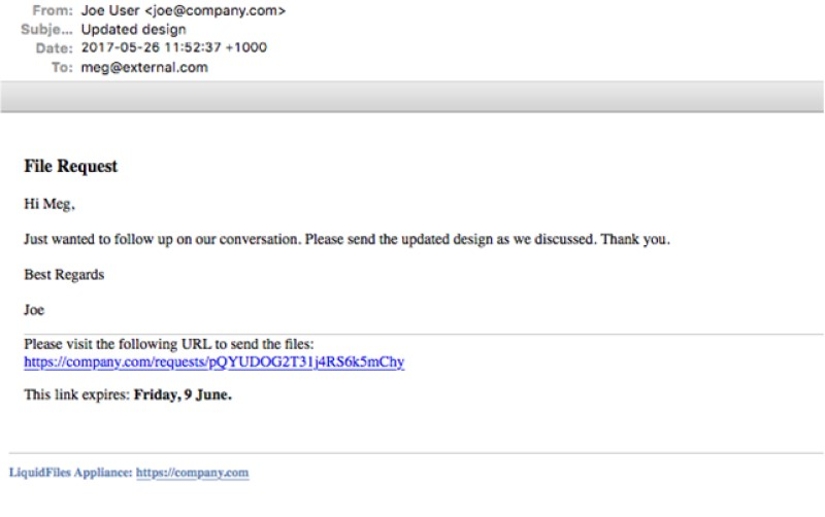
And when the user clicks on the File Request, they will be taken to a page that will look something like this:
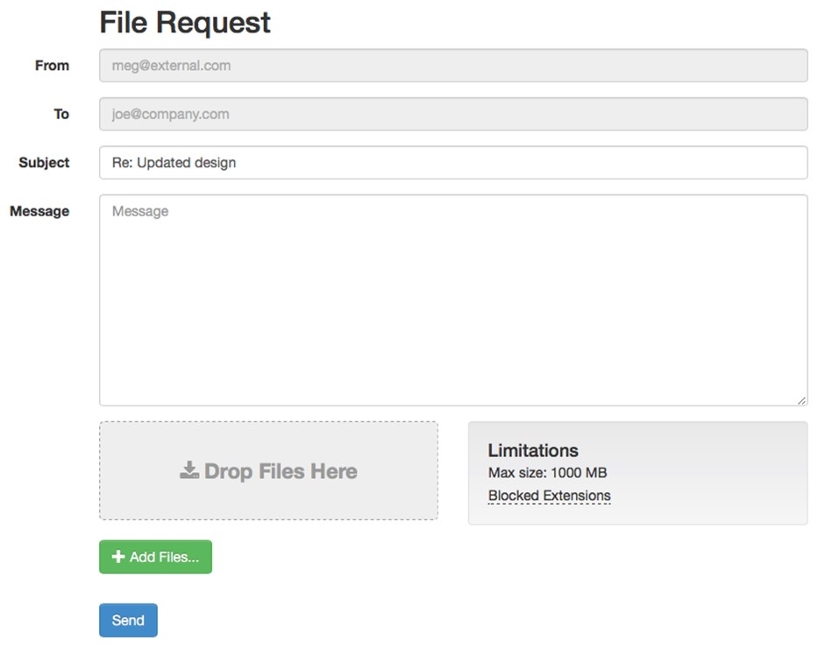
Where they can send the Requested Files back to the requester.
A couple of things to note:
- The Link is one time use only and will expire when the files have been delivered. If you need something to be used more than once, please look at using the Filedrop instead.
- The user that got the link doesn't need to register or do anything other than clicking on the link in the email, and since they got the email with the link, we know that the email address is valid.
Filedrop
A Filedrop is a permanent URL that you can use to receive files. You can for instance:
- Add this link to your email signature.
- Post in forums and other public places where you also would be comfortable to post your email address.
- Send to anyone in a private email for them to use when sending files to you repeatedly.
Filedrop LInk Found in Account Section
You can get your Filedrop link by going to the Account Section. It will look something like this:

Visiting the Filedrop
When someone visits your Filedrop URL (https://liquidfiles.company.com/filedrop/~VZ209z in this example), they will see a page like this:
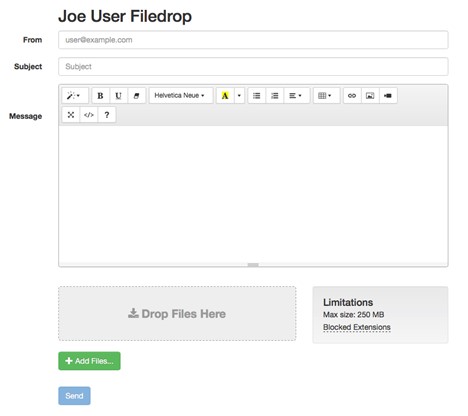
Anyone who visits this page will be able to send files to you by filling in all the fields, clicking on the "Add Files" button and clicking "Send". Please note that there is no "To" field. Since this is your Filedrop URL, all files sent here will always be delivered to you.
Two Links - One Random and One With Email Address
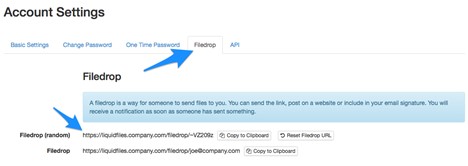
In the Filedrop tab, you will see two links, one random and one with your email address.
Random
The random link is a link which can't be guessed so it is safer to post in places when you're not sure if you want to share your email address. If the link ever falls in the wrong hands, you can always go back to this page and click on the "Reset Filedrop URL" button. This will generate a new random Filedrop URL for you. Please note that this will automatically expire your previous URL so anyone who will try to use the previous URL will get a 404 page not found message.
Email Address
The link with your email looks nicer and is easier to validate if someone must type it in. But this link will never expire (unless you change email address).
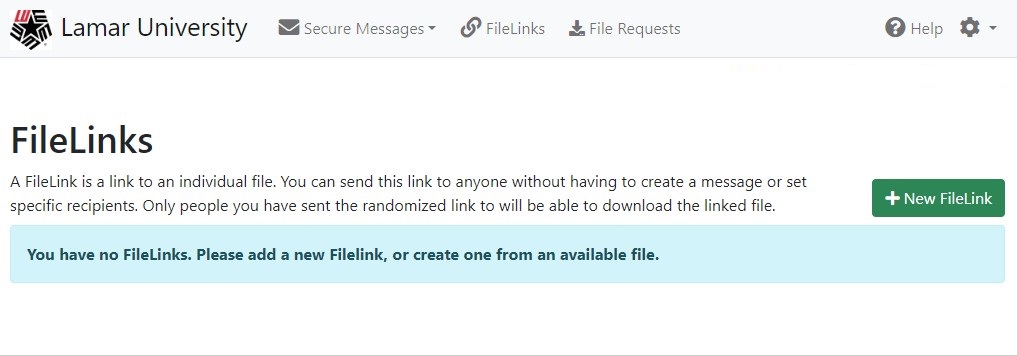
FileLinks
FileLinks are direct links to files. They are a way to easily share files without having to send them to a specific recipient. You can access them by clicking on FileLinks in the main header.
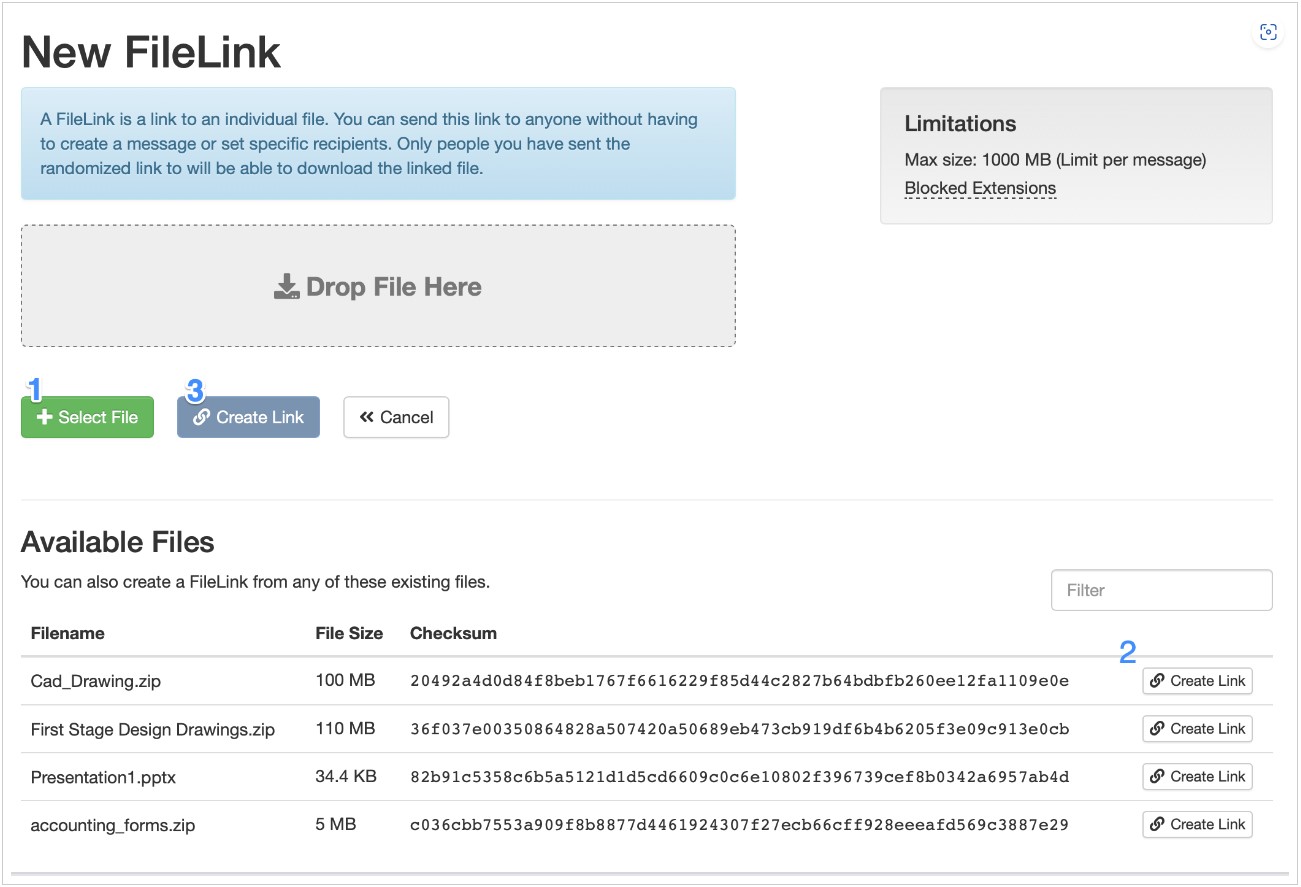
The options available include
- Select a file (in this screenshot that has already been done).
- You can Remove the file and Select another.
- Set for how long this FileLink is available for.
- Set if you wish to receive Download confirmations when someone's downloaded this file.
- If users are required to login to this system to access the FileLink.
- You can set a password that needs to be entered in order to access this FileLink.
- Or instead of uploading a new file, you can select any of the currently existing files to create a FileLink with.
The FileLink page
When a user is visiting the FileLink, they will see the following page.
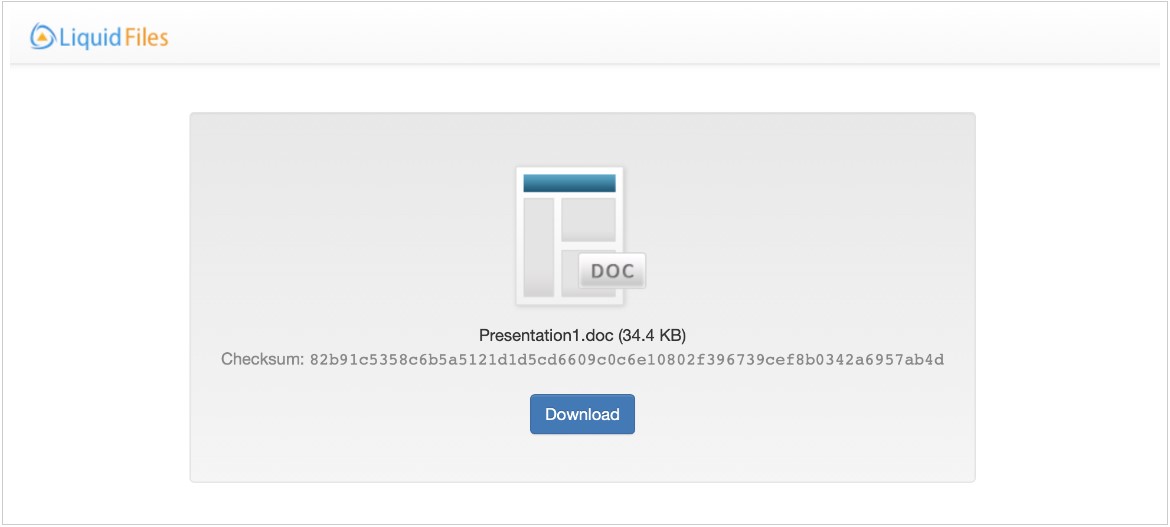
- The file details including filename, file size and SHA-256 checksum.
- The download button.
When you will visit one of your own FileLink pages, will see the following page.
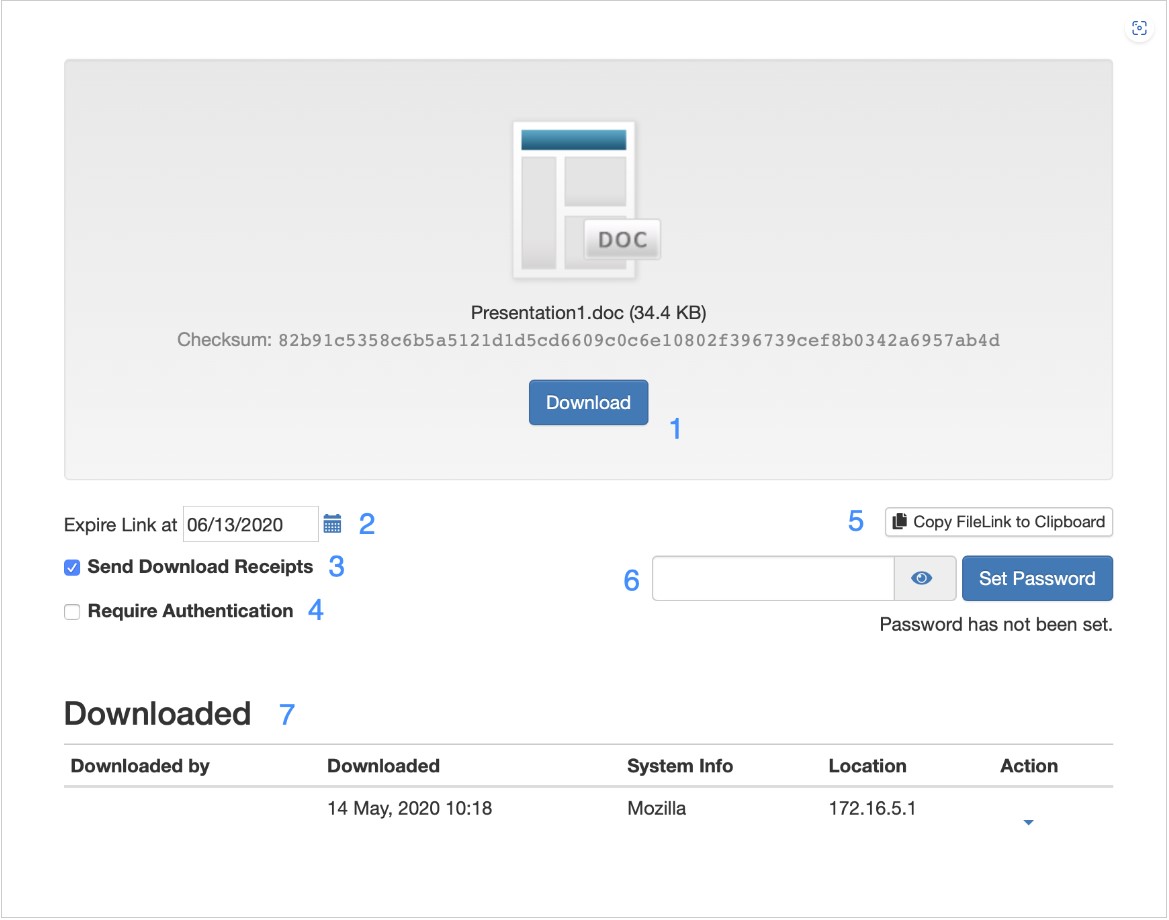
- The file details including filename, file size and SHA-256 checksum (same as any other user).
- You can see/update the FileLink expiration date.
- You can see/update the Download Receipt Status.
- You can see/update the Require Authentication requirement.
- Clicking the copy FileLink to clipboard button will copy the URL to the FileLink to the clipboard.
- You can see if a password has been set and update as needed.
- The list of all downloads for this FileLink.
Using the "Copy FileLink to Clipboard" function, you can now copy the FileLink in a chat message, post on a forum, post in SharePoint or anywhere else where you want to make this file available.
Anyone who access this URL will see this file but only you will have the ability change settings.
Using the Outlook Plugin
If your administrator has installed and enabled the Outlook plugin, when you're composing a message in Outlook, you will see an additional section, like this:
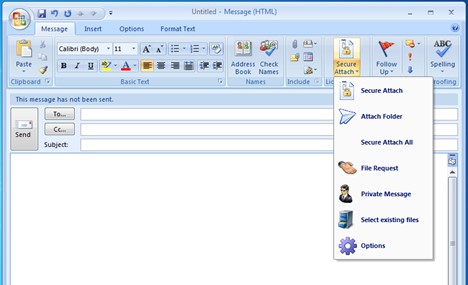
Selectable Options
These are the selectable options in the LiquidFiles Secure Attach Dropdown menu:
- Secure Attach — any file you would normally attach using the attach icon on Outlook can be attached using this Secure Attach button instead. This will cause any file attached to the email to be sent using LiquidFiles.
- Attach Folder — you can also attach a folder at once and all files in this folder will be attached to this email.
- Secure Attach All — the Outlook plugin will automatically send large files through LiquidFiles. If you have a combination of larger and smaller attachments, that means that some will go through LiquidFiles and some direct. By Selecting Secure Attach All, all files, large and small, will be sent through LiquidFiles.
- File Request — use LiquidFiles to request a large and/or sensitive file from someone. The recipient of the File Request will receive a link they can use, and any files attached will be delivered safely back to you.
- Private Message — this will cause the body of the email to be sent securely through LiquidFiles with or without any attachments. You will get confirmation when someone has opened your email as well as downloaded any attachments.
- Select Existing Files — this will list already uploaded files from previous messages that you can send again without having to upload.
- Options — configure the LiquidFiles Outlook plugin.
After File is Selected
When you have selected a file to attach and send through LiquidFiles, another pane will open like this:
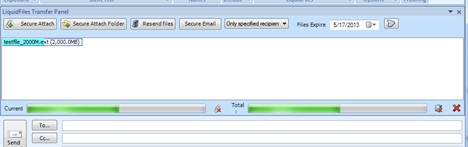
Here you can see the files during upload, when they have completed uploading and any error messages as well.
In the menu bar of this pane are the buttons from the top ribbon duplicated with a couple of additions:
- The Permission Settings same as you would see in the web interface.
- The Message expiration date when this message and these files will expire.
- The button to the far right in the menu bar is another settings button.
- In the bottom, just above the "To" field you will see the current and overall progress bars for the files.
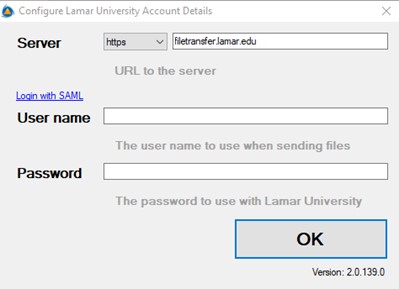
Outlook Plugin Settings and Configuration
When you secure attach your first file to LiquidFiles, you will see the login window:
On the area labeled ‘Server’, use the drop box to choose 'https' from the list, type filetransfer.lamar.edu in the server URL box, and then press the tab button.
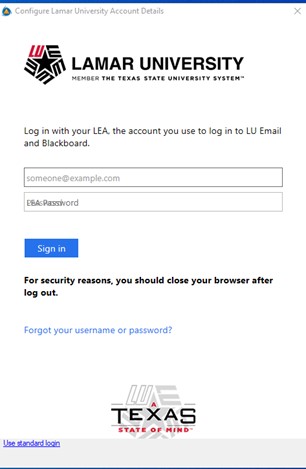
LEA Login Page
You should be redirected this LEA login page.
Enter your LEA credentials in the Username and Password boxes and click on the OK button when finished. DO NOT JUST PRESS ENTER after typing out your LEA credentials.
A successful login should present you with an ‘Authentication Successful’ message in the configuration box before it then minimizes itself.
NOTE: that you only need to fill this in once and the LiquidFiles Outlook plugin will keep you logged until you’ve logged out of the plugin.
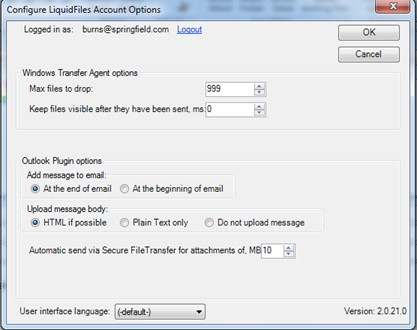
Settings Window
The Settings Window for the plugin looks like this:
And has the following configurable settings, from the top:
- It displays the currently logged in user.
- How many files you can attach at once and how long you want to see the window visible after you've sent the files.
- If you want the LiquidFiles Attachment information to be placed below the body your email or at the top of it (please see Receiving Files to see how the attachment information looks).
- Send the message using HTML or plain text, or do not send any message through LiquidFiles.
- The settings to automatically send attachment above a certain size will attach files to LiquidFiles regardless of if you have clicked the "normal" attach or the secure attach button if the file is above this size.
Source: LiquidFiles User Guide, https://docs.liquidfiles.com/userguide.html, 2025.