
Using Your LU Email-Faculty/Staff
Outlook Desktop Client (Windows)
Add Signatures
- Open Outlook
- Click Mail in the bottom-left corner of the window
- On the Home tab, click New Email.
- On the Message tab, click Signature > Signatures.
- Under Select signature to edit, choose New, and in the New Signature dialog box, type a name for the signature.
- Under Choose default signature, do the following:
- In the E-mail account drop-down list, choose an email account to associate with the signature.
- In the New messages drop-down list, choose the signature that you want to be added automatically to all new email messages. If you don't want to auto sign your email messages, accept the default option of (none).
- In the Replies/forwards drop-down list, choose the signature that you want to be added automatically (auto sign) when you reply to or forward messages. Otherwise, accept the default option of (none).
- Under Edit signature, type the signature
- Click OK
Reporting Junk
- Open Outlook
- Select the email you wish to report
- Click on the arrow beside Junk in the Delete section on the ribbon
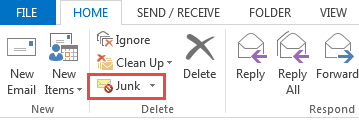
- Click Junk > Report Junk to report Spam
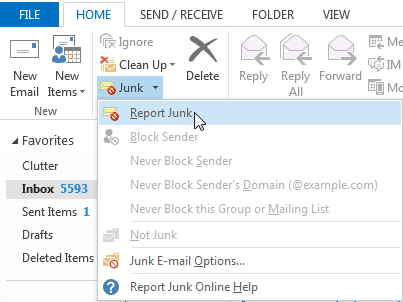
Note: Right-click sends to Junk folder and does not report as junk to Microsoft. Do not mark legitimate campus email messages as junk.
Mail Rules
- Open Outlook
- In the Navigation Pane, click Mail.
- On the Tools menu, click Rules and Alerts.
- If you have more than one e-mail account, in the Apply changes to this folder list, select the Inbox that you want.
- Click New Rule.
- Select a template
- Under Step 1: Select a template, select the template that you want from the Stay Organized or Stay Up to Date collection of templates.
- Under Step 2: Edit the rule description, click an underlined value. For example, if you click the people or distribution list link, the Address Book opens.
- Which condition(s) do you want to check?
- Under Step 1: Select condition(s), select the conditions that you want the messages to meet for the rule to apply.
- Under Step 2: Edit the rule description, click an underlined value if you have not done so already, and then click Next.
- Select a template
-
- What do you want to do with the message?
- Under Step 1: Select action(s), select the action that you want the rule to take when the specified conditions are met.
- Under Step 2: Edit the rule description, click an underlined value if you have not done so already, and then click Next.
- Are there any exceptions?
- Under Step 1: Select exception(s), select any exceptions to the rule, and then click Next.
- Finish rule setup
- What do you want to do with the message?
-
-
- To finish creating the rule, enter a name for the rule, and then select any other options that you want.
-
If you want to run this rule on messages that already are in one of your folders, select the Run this rule now on messages already in "folder" check box.
-
To apply this rule to all your e-mail accounts and the Inbox associated with each account, select the Create this rule on all accounts check box.
- Click Finish
-
Outlook Desktop Client Tips
Tip 1: Auto Completes
Pre-existing email addresses in Outlook’s cache may cause messages to bounce. To avoid this issue follow these steps to clear your Auto-Complete.
Remove all recipients
- Choose File > Options > Mail
- In the Send Message section, click Empty Auto-Complete List
- Choose Yes to confirm
Tip 2: How to set your default address book
- On the Home ribbon, click Address Book in the Find group
- From the Tools menu, choose Options
- The list will not contain the contacts you add yourself. (Your contacts are personal to you and are in the Contacts list.)
- If you want Outlook to default to your contacts, click Start With Contact Folders option.
- You can further customize Outlook by clicking Custom. When choosing this option, you can set a custom list as the default.
Automatic Replies (Out of Office)
- Open Outlook
- Click File > Automatic Replies (Out of Office)
- In the Automatic Replies box, select Send automatic replies
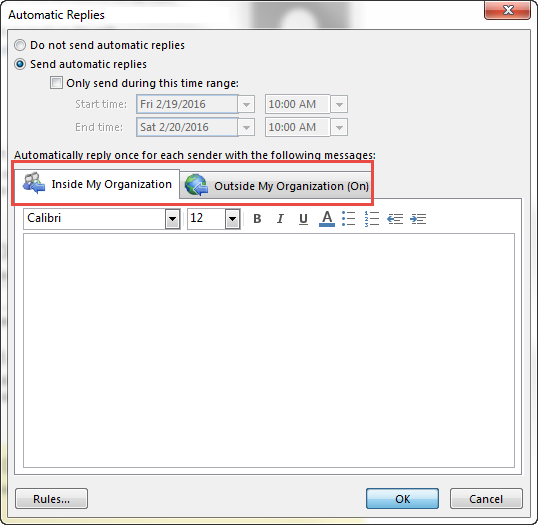
- On the Inside My Organization tab. Type the response that you want to send to colleagues while you are out of the office.
- On the Outside My Organization tab, check the Auto-reply to people outside my organization
- Type the response you want to send while you are out of the office. Select Anyone outside my organization.
Sharing Your Primary Calendar-Reviewer
Reviewer Can Read Items and Files Only
- Open Outlook
- Right-click your primary calendar under My Calendars.
- Click Share > Share Calendar
- Click To and select the desired names
- Click the Details drop-down list and select from the following:
- Availability Only – Provides assignee with free/busy information
- Limited Details – Provides assignee with subject, location, day, and time
- Full Details – Provides assignee full event details including: subject, location, attendees, and description
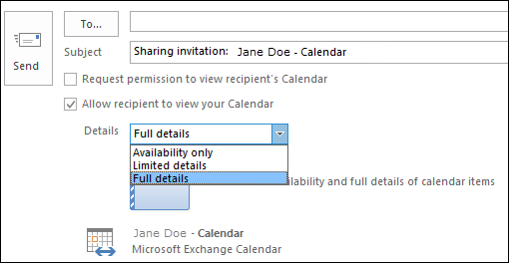
- Click Send
Sharing Your Primary Calendar-Editor
Editor Can Create, Read, Modify, and Delete All Items and Files
Step 1: Share as Reviewer with the following steps:
- Open Outlook
- Right-click your primary calendar under My Calendars.
- Click Share > Share Calendar
- Click To and select the desired names
- Click the Details drop-down list and select from the following:
- Availability Only – Provides assignee with free/busy information
- Limited Details – Provides assignee with subject, location, day, and time
- Full Details – Provides assignee full event details including: subject, location, attendees, and description
- Click Send
Step 2:
- Open Outlook
- Right-click your primary calendar under My Calendars.
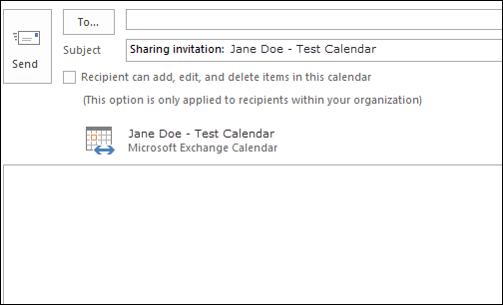
- Click Share > Share Calendar
- Click To and select the desired names
- Click the Details drop-down list and select Full Details
- Click Send
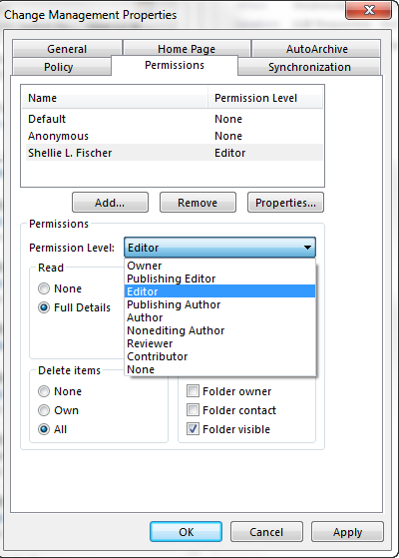
- Right-click your primary calendar
- Select Properties > Permissions
- Select the name of the person you want to assign editor permissions.
- Select the Permissions Level drop-down and click Editor.
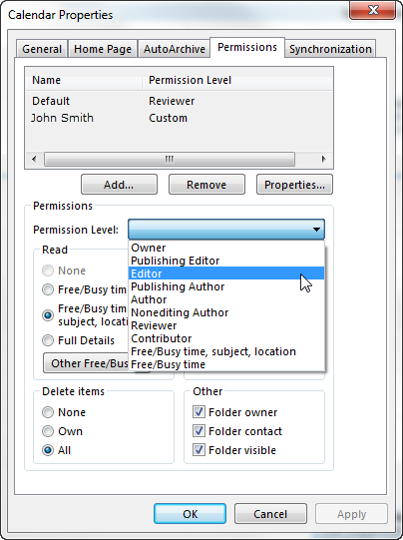
- Select Apply > OK
Sharing your Secondary Calendar-Reviewer
Reviewer Can Read Items and Files Only
- Open Outlook
- Click Mail in the bottom-left corner of the window
- Select the designated calendar
- Click Share > Share Calendar
- Click To and select the desired names
- Click Send
Adding A Shared Calendar
- Open Outlook
- Open the sharing invite email from your Inbox
- Click Open this Calendar
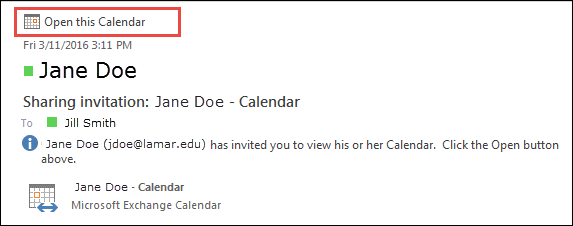
Based on permissions assigned, the calendar will open and will now appear in your My Calendars list or your Shared Calendars list.
Sharing Email Folders
If you would like to give someone permissions to access any email folder, there are three steps.
Step 1: You need to give the person permission to access your account name (e.g., Jane Doe)
Step 2: You need to give the person permission to access your primary folder (Inbox)
Step 3: You need to give the person permission to access each Folder/Subfolder you want to share
The process for sharing your Mailbox and your Individual folders is the same.
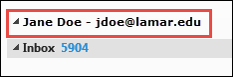
Step 1: Permission to access your account name (e.g., Jane Doe)
- Open Outlook
- Click Mail in the bottom-left corner of the window
- Right-click your account name
- Click Data File Properties
- Click the Permissions tab
- Click Add..and add the person(s) with whom you wish to share your folder and click OK
- Click the person(s) and select Folder visible under Other
- Click Apply and OK
Step 2: Permission to access your primary folder (e.g., Inbox)
- Right-click on Inbox
- Click the Permissions tab
- Click Add. Add the person(s) with whom you wish to share your folder and click OK
- Click the person(s) and select Folder visible under the Other section
- Click Apply and OK
- Send the person you just shared with an email notifying them they now have access
Step 3: Permissions to access each Secondary Folder/Subfolder you want to share
- Right-click desired secondary folder > Properties
- Click the Permissions tab
- Click Add. And add the person(s) with whom you wish to share your folder and click OK
- Click the Permissions Level drop-down and select one of the following:
- Reviewer - Read items and files only.
- Editor – Create, read, modify, and delete all items and files.
- Click Apply and OK
- Send the person you just shared with an email notifying them they now have access.
Recurring Appointments/Events
- In any calendar view, click New
- In the Untitled - Appointment window
- Click to put a checkmark in the All day event box or next to the start and end times for a specific time.
- Fill out the remaining fields as you would for an appointment. By default, if someone schedules a meeting for that day, the Scheduling Assistant will show you as free, but you can change this to show you as busy all day with the drop-down list in the toolbar
- Click
Accessing a Shared Mailbox Email
- Open Outlook
- Click File
- Click Open & Export
- Click Other User’s Folder
- Type the shared account email address, then click OK
Note: If the account is hidden from the Global Address List (GAL), Outlook will not be able to find the account to open it.
Distribution List
Start the import for Outlook Desktop Client
- Open Outlook
- Click People
- Click File > Open & Export > Import/Export
- Choose Import from another program or file and click Next
- Choose Comma Separated Values and click Next
- Click Browse and locate the saved CSV file.
- Under Options, choose Do not import duplicate items.
- Click Next and choose where you want to store your new, imported contacts. Contacts should be selected by default. If you want a different folder, scroll to find the folder you want to use.
- Click Next.
- Make sure the check box next to Import “Filename.csv” is selected.
- Don't click Finish yet, because you need to "map" some of the columns in your CSV file to the contact fields in Outlook.
Step 2: Map your CSV file columns to Outlook contact fields
-
Click the Map Custom Fields button. The Map Custom Fields box appears.
-
Under From, a box shows the column names from your CSV import file
-
Under To, you see the standard fields that Outlook uses for contacts. If one matches a column in the CSV file, you'll see your column under Mapped from.
-
- You'll probably need to do some manual mapping. For example, in the following example, in your import file the contact's home phone number is in a column named Email Account. This doesn’t have an exact match in Outlook. Instead, Outlook uses the field Email Address.
-
Drag Email Account from the pane on the left and drop it on Email Address in the right pane. Email Account now appears in the Mapped from column. One at a time, drag the rest of the values from the left pane to the appropriate Outlook fields in the right pane.
- Click OK and Finish.
Step 3: Create your contact group
- Click People
- Under My Contacts, pick where you want to add the contact group. For this example, click Contacts.
- Click Home > New Contact Group
- On the Contact Group tab, in the Name box, type a name for the group
- Click Add Members > From Outlook Contacts
- Hold down CTRL, click the contacts you imported, and then click Members to add them to the contact group.
- Click OK
- Click Save and Close.
Outlook Web App
Accessing Your Email
-
Go to https://outlook.com/lamar.edu to access your Inbox.
-
Type your LEA email address, for example, jsmith, and password, and select Sign in.
-
If this is your first time signing in, you're asked to select the language and time zone.
Note: For Windows and Mac. Recommended browsers include Internet Explorer 11, current versions of Firefox, Chrome, and Safari.
Expanding Folders
- Go to https://outlook.com/lamar.edu to access your Inbox.
- Click More to expand the folder list.
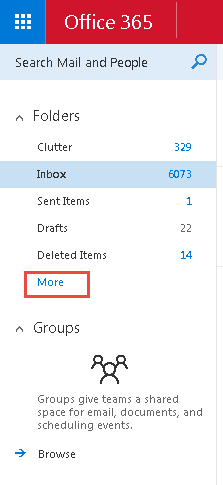
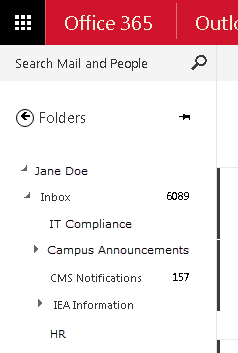
- The folder list is now expanded
Importing Contacts
- Go to https://outlook.com/lamar.edu
- Click App Launcher,
 and then click People.
 - Click Import
- Choose Outlook 2013…, browse for the file.
Note: For Windows and Mac. Recommended browsers include Internet Explorer 11, current versions of Firefox, Chrome, and Safari.
Setting Up An Email Signature
- Log in to your LU Email at https://outlook.com/lamar.edu
- Click App Launcher, and then click Mail.
- Click Settings
 > Options
 - Click Mail > Layout > Email signature
- Type your signature
- Specify the font and other settings you want to use
- Choose Automatically include my signature on messages I compose
- Click Save
Note: For Windows and Mac. Recommended browsers include Internet Explorer 11, current versions of Firefox, Chrome, and Safari.
Mailbox Shares
- Log in to LU Email at https://outlook.com/lamar.edu
- Right-click on the folder to share and select Permissions.
- Click +
- Type the name or email address of the person you want to grant permissions to the folder
- Select one of the following permission levels:
- Owner - Create, read, modify, and delete all items and files, and create sub-folders. As the folder owner, you can change the permission levels others have for the folder. (Does not apply to delegates.)
- Contributor - Create items and files only. The contents of the folder do not appear. (Does not apply to delegates.)
- Reviewer - Read items and files only.
- Non-Editing Author - Full read details. Create items. Delete own items. Folder visible.
- Publishing Editor - Create, read, modify, and delete all items and files, and create subfolders. (Does not apply to delegates)
- Editor - Create, read, modify, and delete all items and files
- Publishing Author - Create and read items and files, create subfolders, and modify and delete items and files you create. (Does not apply to delegates)
- Author - Create and read items and files, and modify and delete items and files you create.
- Nonediting Author - Create items (not folders), but cannot edit anything. Only can delete items that they have created.
- Reviewer -Read items and files only
- Contributor - Create items and files only. The contents of the folder do not appear. (Does not apply to delegates)
- Custom - Perform activities defined by the folder owner. (Does not apply to delegates.)
Note: With author or editor permissions, a delegate has send-on-behalf-of permission. Sent messages contain both the managers and delegates names. Message recipients see the managers name in the Sent On Behalf Of box and the delegates name in the From box.
- After selecting the Permission Level, modify the Read, Write, Delete items, and Other sections as needed.
- Click OK
Note: For Windows and Mac. Recommended browsers include Internet Explorer 11, current versions of Firefox, Chrome, and Safari.
Sharing your Calendar
To share your calendar
- Click Calendar
- Select the calendar you desire to share and right-click
- Click Share > Share Calendar
- Type the email address of the person you want to share your calendar with
- Click Send
To open a shared calendar
- Open the Sharing invitation
- Click Open this Calendar
- The shared calendar will appear beside any other open calendars.
Note: Depending on the permissions set by the sender, the shared calendar might appear under:
- Other Calendars if editing privileges were granted
- Shared Calendars if view only privileges were granted
Note: For Windows and Mac. Recommended browsers include Internet Explorer 11, current versions of Firefox, Chrome, and Safari.
Mail Filters
- Log in to your LU Email at https://outlook.com/lamar.edu
- Click the icon, then
- On the Options screen, in the column on the left, click O.
- Select I (default)
- Click +, then select the desired option. (For example, )
- Type your rule
- Under When the message arrives, and, select the desired criteria.
-
- If your criterion is based on a person, a people window will open, where you can find and select the desired person.
- If your criterion is based on looking for specific words, a specify words or phrases dialog box will open. You must type the word or phrase, click the , then click O.
You'll see the value(s) you specified to the right of the criterion you specified.
- Under Do the following, select the action you want the rule to take. A window or dialog box will open where you can select the folder, category, or person associated with the action you selected.
- Click S
Note: For Windows and Mac. Recommended browsers include Internet Explorer 11, current versions of Firefox, Chrome, and Safari.
Junk
- Log in to your LU Email at https://outlook.com/lamar.edu
- Select the desired email
- Click the arrow beside Junk in the tool bar
- Click Junk and the message below will appear
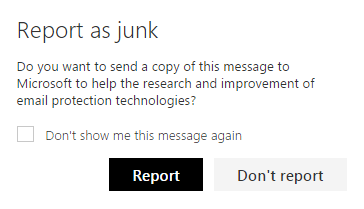
- Click Report
Note: For Windows and Mac. Recommended browsers include Internet Explorer 11, current versions of Firefox, Chrome, and Safari.
Setting Up Automatic Replies (Out of Office)
- Log in to your LU Email at https://outlook.com/lamar.edu
- Click Settings > Automatic replies
- On the automatic replies page, select Send automatic replies
- Select the Send replies only during this time period checkbox
- Specify the Start and End dates and times
- Select Send automatic reply messages to senders inside my organization
- Select Send automatic replies to all external senders
- Type your message in both text boxes
Note: For Windows and Mac. Recommended browsers include Internet Explorer 11, current versions of Firefox, Chrome, and Safari.
Sharing your Calendar
- Log in to your LU Email at https://outlook.com/lamar.edu
- Select the App launcher and then select Calendar.
- Select Share
- Type the name or email address of the person that you want to share your calendar with
- Select one of the following options:
- Availability only - Shows the time of items on your calendar and no other details.
- Limited details -Show the time, subject, and location, but no other information
- Full details - Show the time, subject, location, and other details of all items in your calendar
- Editor - An editor can edit your calendar
- Delegate - A delegate can edit your calendar, and can send and respond to meeting requests on your behalf
- Select Send
Note: For Windows and Mac. Recommended browsers include Internet Explorer 11, current versions of Firefox, Chrome, and Safari.
Recurring Appointments/Events
- Click the app launcher and then click Calendar
- Click + New.
- Type the event (meeting) name and location.
- Type the names of invitees in the Add people box, or choose + to open add them from your list of contacts.
- Choose Scheduling Assistant to see your invitee’s availability.
- Specify the date, time, duration and reminder.
- Type the agenda
- Click Send
Note: For Windows and Mac. Recommended browsers include Internet Explorer 11, current versions of Firefox, Chrome, and Safari.
Conversation View
- Log in to your LU Email at https://outlook.com/lamar.edu
- Go to Settings > Options
- On the left navigation bar, go to Mail > Layout > Conversations
- Select which order to show the items, Newest messages on top or Oldest messages on top.
- Select to show or hide deleted items
- Click Save
Note: For Windows and Mac. Recommended browsers include Internet Explorer 11, current versions of Firefox, Chrome, and Safari.
Reply Settings
- Log in to your LU Email at https://outlook.com/lamar.edu
- Go to Settings > Options
- On the left navigation bar, go to Mail > Automatic Processing > Reply Settings
- Change the default response from Reply All to Reply
- Click Save
Note: For Windows and Mac. Recommended browsers include Internet Explorer 11, current versions of Firefox, Chrome, and Safari.
Creating a Contact List
- Log in to your LU Email at https://outlook.com/lamar.edu
- Select the App launcher and then select People
- Select My Contacts
- Click the arrow beside New and select Contact List
- Type the name of your list in the List Name box
- Type the name of each person in the Add Members box and press Enter
- Click Save
Note: For Windows and Mac. Recommended browsers include Internet Explorer 11, current versions of Firefox, Chrome, and Safari.
Opening a Shared Mailbox
Note: With Full Access & Send As Permissions
- Login to your LU Email account https://outlook.com/lamar.edu
- Click on the person icon
 and select Open another mailbox…
 - Type the email address of the shared account then click Search
- Select the account and click Open
- The shared mailbox will open in a new tab. You will have access to the shared accounts Mailbox, People, and Calendar
Accessing a Shared Mailbox
- Login to your LU Email account https://outlook.com/lamar.edu
- In the left pane under Folders, click More
- Right click on your account name and click Add shared folder…
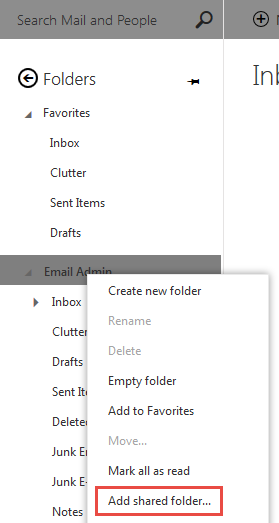
- Type the email address of the shared account and click Add.
- If given Full Access, you will see all email folders within the shared mailbox and be able to manage the messages. If only certain folders are shared to you, you will only be able to see those folders.
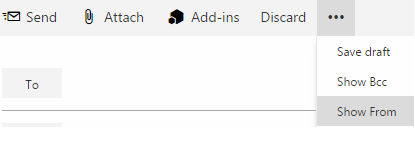
Sending an Email from the Shared Account Address
Note: You must be granted Send As or Send on Behalf permission to send an email message from another account address.
- Login to your LU Email account
- Start a new mail message
- Type the desired sending address in the from field
- Click on the eclipse next to Discard and select Show From
Mac Mail
Add Signatures
- Open Mac Mail
- Select Mail > Preferences
- In the Preferences window, select Signatures
- If you wish to add a signature for all accounts, select the All Signatures option. Otherwise to add a signature to a specific account, select that specific account.
- Click the + sign to add a new signature to an account.
- Name the signature so you know what it is and then add the signature in the right box.
- From the drop-down box, you can choose a signature as the default for an account when composing a message. This signature is automatically added to each message you compose
Automatic Replies
- Choose Preferences > Rules.
- Click “Add Rule” and give it a description, (e.g., Out of Office Reply).
- Choose your condition - apply to “Every Message” using the drop-down menu and choose Reply to Message.
- Click Reply message text and type the text of your senders will receive while you are away.
- Click OK to finish creating the rule.
- You will be prompted to apply the rule to existing messages. Choose Don’t Apply so that the rule only applies to new messages you receive.
Viewing Shared Calendar
- From iCal's iCal menu, select Preferences
- In the dialog box that opens, click Accounts
- In the Accounts dialog box, click on your Exchange account in the list on the left.
- Click the Delegation tab.
- Under Accounts I can access, click +.
- Type all or part of the name of the person, resource, or group account whose calendar you want to access.
- Click on the correct match. iCal will display the level of access you have for that account.
- Click to put a check in the Show column.
- Close the Accounts dialog box.
- The account you just added will appear under Delegates in the left pane of iCal's main window.
Outlook 2016 for Mac
Add Signatures
- Open Outlook
- Click Outlook > Preferences
- Open Signatures
- Click on the plus sign + on the bottom left corner
- Type the desired signature within the "Signature" field.
- Double-click Untitled to rename it
- In the bottom section of the screen, select the desired options/actions (assign signature to new message).
- Close the 'Signature' window
Automatic Replies (Out of Office)
- Go to the Tools option.
- Select Out of Office... and the following box will appear.
- Check the box to Send Automatic Replies.
- Edit the response in the clear box. Additionally you may chose to only send them within a certain time period. You may also elect to send to external senders.
- Select OK to set the auto reply.
Adding A Shared Calendar
- Open Outlook
- Click Calendar in the bottom of the navigation bar
- On the Organize tab, click Open Shared Calendar
- In the Search box, type the name of the person who has granted you access to their calendar, and press Enter
- Select their name, and click Open
Note: The shared calendar appears in the left navigation pane under the Shared Calendar heading, with the person's name who shared the calendar below it.
Mobile Devices
Use phone/tablet settings for Android
- Tap Settings > Accounts > Add account > Email.
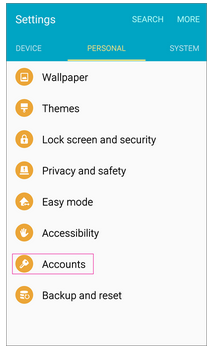
- Choose email.
- Type your full email address, for example jsmith@lamar.edu, type your password, and then tap Next.
- Select the Microsoft active sync.
- Once the device verifies the server settings, the Account Options page opens. Accept the defaults or select the options for how you want to receive and send your mail, and then tap Next. (You may need to scroll down to see Next.)
- On the Set up email page you can change the name of your account. When you're finished tap Next or Done.
If you synced your calendar and contacts in step 5 you can go to those apps on your phone to view any items that might be there. It might take a few minutes for everything to sync.
If your device can't connect, make sure you typed your email address and password correctly and try again. If you still can't connect try setting it up manually.
Outlook App for Android
Note - Outlook for Android requires a device running Android 4.0 or later.
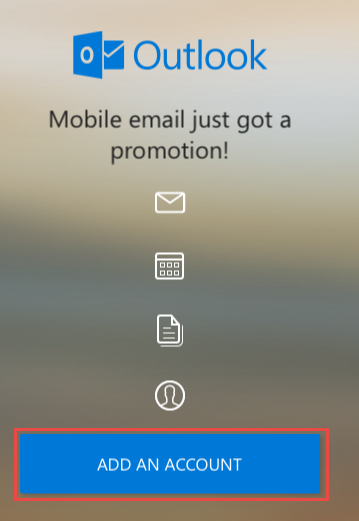
- Download the Outlook for Android app from the Google Play store. Open the Outlook app, choose settings then Add An Account.
- Tap Office 365.
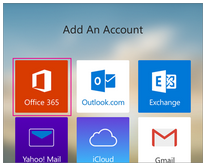
- Enter your full email address, for example jsmith@lamar.edu, type your password, and then tap Sign in.
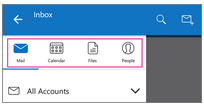
Outlook for Android then starts syncing the account. - To view your calendar, files, or contacts from the app, tap More
 .
.
Use phone/tablet settings for iOS
- Tap Settings > Mail, Contacts, Calendars > Accounts > Add account
- In the Add Account page, tap Exchange.

- Enter your full email address, for example jsmith@lamar.edu, and your password, and then tap Next.
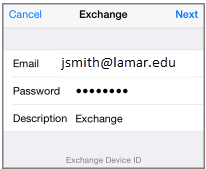
- By default, Mail, Contacts, and Calendar information are synchronized. Tap Save.
Note: Recommended browsers include Internet Explorer 11, current versions of Firefox, Chrome, and Safari.
Outlook App for iOS
Note Outlook for iOS requires iOS 8.0 or higher. If the app is incompatible with your device, try adding your mail account using the built-in mail app that comes with your device.
- Download the Outlook for iOS app from the Apple Store.
Open it, then tap Add An Account.
- Tap Office 365.
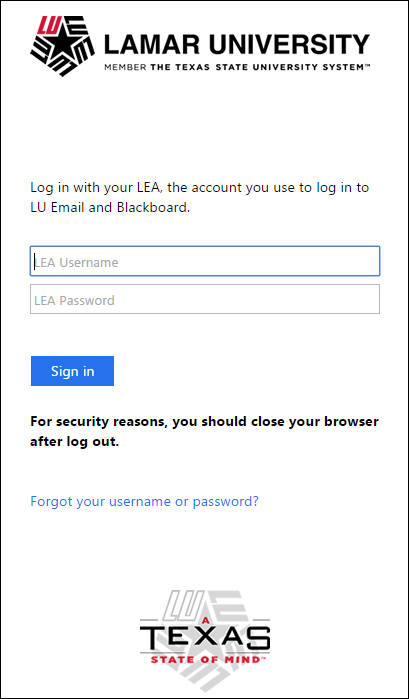
- Type your full email address, for example jsmith@lamar.edu.
- You will be redirected to the LU login page.
- Enter your email and password.
Tip If you get a time-out message, your password or other information might be incorrect. Retype the information, and then try again.
Outlook Mobile App
Organize Mail by Thread
- Tap Outlook
- Tap
 and select Settings
 - Scroll down to Organize Mail By Thread and toggle it on.
Swipe Options
- Tap Outlook
- Tap and select Settings
- Under Mail select Swipe Options
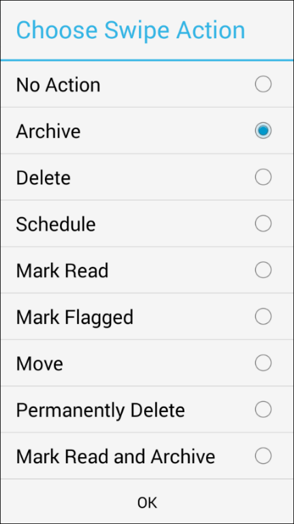
- Customize Swipe Left and Swipe Right
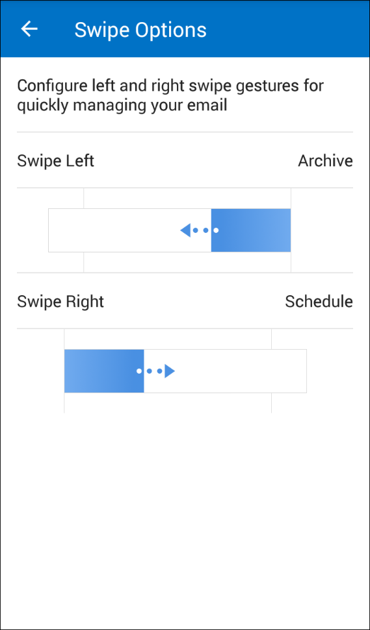
- Tap OK
Enabling Clutter
Note: Clutter is a new feature that helps filter your low-priority email—saving time for your most important messages. Clutter has been turned off, however, you can enable this feature.
- Log in to your LU Email at https://outlook.com/lamar.edu
- Go to Settings > Options
- On the left navigation bar, go to Mail > Automatic Processing > Clutter
- Select Separate items identified as Clutter
- Click Save
Filters
- Tap Outlook
- Tap Filters
 from your Inbox
 - Select one of the options to filter your messages:
- Unread
- Flagged
- Attachments
Focused Inbox
- Tap and select Settings
- Scroll down to Focused Inbox and toggle it on.

General Information
Manage your Quota
The quota for your Office 365 mailbox is 50GB. There are several ways to manage your mailbox and reduce the size of the data file.
- Clean-up your Inbox and Sent folder items
- Evaluate email that is 5-7 years old or older and determine if it should be deleted or archived.
- Determine if mailing-list can be deleted
- Delete your Junk folder items
- Most of the mail in this folder is Spam.
- Review the subjects and sources of e-mail in this folder occasionally
- Delete all of the email that is not needed.
- If there is something in this folder that you want to keep, move it into another folder.
- Empty your Deleted folder items
- Items in the Deleted items folder count against your quota.
- Enable the Empty Deleted Items upon Exit feature
- Windows
- Right-click Deleted Items folder
- Click Empty Folder or Erase Deleted Items.
- Click Yes to continue
- Windows
- Clean up attachments
- If you receive a message with a large attachment, save the attachment to your hard disk and delete it.
- Attachments often take up a large amount of space and can cause your mailbox to go over quota.
Online Office Apps
Upload files to OneDrive For Business In a Browser
After you upload files to OneDrive for Business, you can see them from other devices by just signing into your Office 365 site in your browser and then clicking OneDrive for Business.
- Access portal at: portal.office.com
- Select, Upload

- In the Choose File to Upload dialog box, select the files you want to upload, and then click Open.
Note: Recommended browsers include Internet Explorer 11, current versions of Firefox, Chrome, and Safari.
Viewing files from any device
- On any device, sign in to portal.office.com with your LEA email address, for example, jsmith@lamar.edu.
- At the top of any page in Office 365, select OneDrive. Or select, and then select OneDrive.
Note: Recommended browsers include Internet Explorer 11, current versions of Firefox, Chrome, and Safari.
Saving a File (Desktop)
- Open a document in an Office desktop app such as Word, Excel, or PowerPoint, and then click File > Save As > OneDrive – lamar.edu.
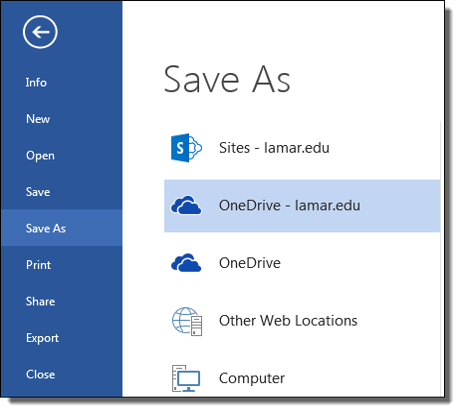
- Browse to the location where you want to save the file, and then click Save.
Note: Recommended browsers include Internet Explorer 11, current versions of Firefox, Chrome, and Safari.
Opening a File (Desktop App)
- In an Office desktop app such as Word, Excel, or PowerPoint, click File > Open > OneDrive – lamar.edu.
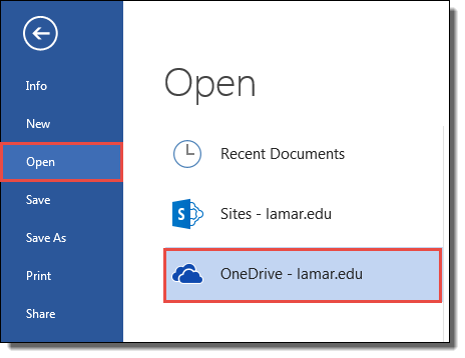
- Browse to the file you want to open, and then click Open.
Note: Recommended browsers include Internet Explorer 11, current versions of Firefox, Chrome, and Safari.
Setting Up OneDrive For Business on Your Desktop
If you don't see OneDrive – Lamar.edu under Save As or Open:
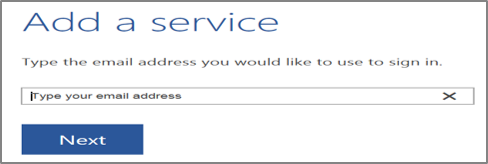
- Select Add a Place > Office 365 SharePoint.
- Sign in to Office 365 with full email address.
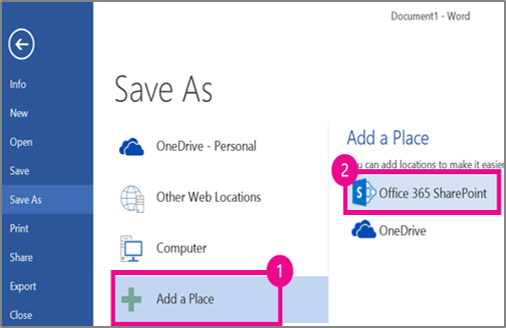
Once you add OneDrive for Business as a place in one Office app, such as Word, Excel, PowerPoint, or OneNote, you’ll be set up to save files from all of your Office apps.
Note: Users should not sync the Lamar OneDrive for Business to personal devices
Note: Recommended browsers include Internet Explorer 11, current versions of Firefox, Chrome, and Safari.
Syncing In OneDrive For Business
To work with your OneDrive for Business files directly in File Explorer and access them even when you're offline, sync the files to your computer. Whenever you're online, any changes that you or others made will sync.
Note: Users should not sync the Lamar OneDrive for Business to personal devices
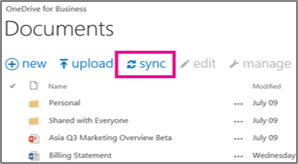
- On your OneDrive for Business page, click Sync.
- At the prompt, click Sync Now to start the sync app.
- The app automatically fills out the name and web address of your OneDrive for Business library.
- Select Sync Now in the app to start syncing.
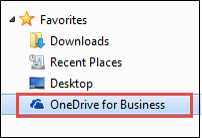
Once the files are synced, another box will appear and you can click Show my files in the that box to open the synced OneDrive for Business folder in File Explorer. The folder appears in your Windows Favorites as OneDrive for Business or OneDrive – lamar.edu
Note: Recommended browsers include Internet Explorer 11, current versions of Firefox, Chrome, and Safari.
Editing In OneDrive For Business
- Open a browser and go to portal.office.com and
- Open the OneDrive for Business.
- Select the document you want to edit.
- Once you have opened your document, you can edit the document,
- Editing Remotely– Using the online Microsoft application (Edit in Word Online) Edit Online to avoid downloading Lamar data to your personal device
- Editing At Work – Using your desktop application (Edit in Word) and then save it to your OneDrive for Business drive on your local computer.
Note: Recommended browsers include Internet Explorer 11, current versions of Firefox, Chrome, and Safari.
Sharing From a Browser
- From OneDrive for Business, select the file you want to share, and then select Share.

- In the Share window, type the name of each person you want to share the file with.
- Select one of the following permission levels:
- Can View – Assignee can only open and read the item. Can not be moved or changed
- Can Edit – Assignee can move and copy the item within the shared folder, or to their OneDrive for Business, and share with others
- Click Share.
- The email message invitees receive will include a link to the shared document
Note: Recommended browsers include Internet Explorer 11, current versions of Firefox, Chrome, and Safari.
Sharing A File With Individuals From Your Desktop
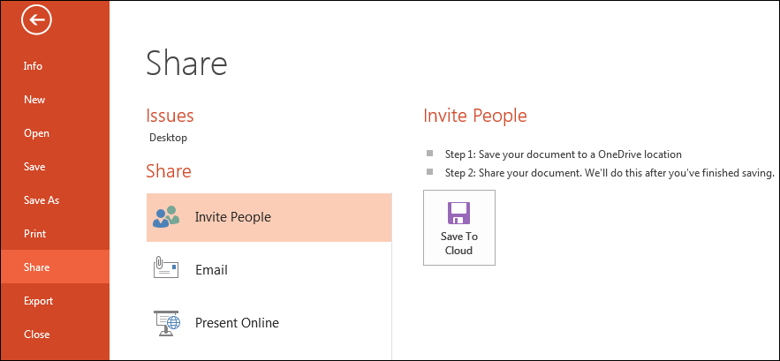
- Ensure the file you want to share is uploaded to OneDrive for Business, by saving the file to OneDrive for Business.
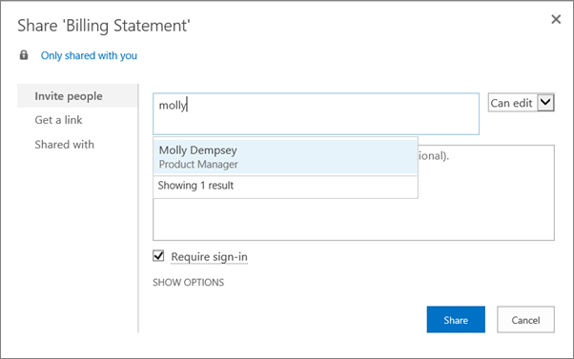
- With the file open in Word, Excel, PowerPoint, or another Office app, from OneDrive, click File > Share > Invite People.
- Under Invite People, type the name of each person you want to share the file with. As you type each name, suggestions appear that match your contacts. When you see the name you want, select it to add it to the invitation list.
- Select one of the following permission levels:
- Read – Assignee can only open and read the item. Can not be moved or changed
- Read/Write – Assignee can move and copy the item within the shared folder, or to their OneDrive for Business, and share with others
- Click Share.
- The email message invitees receive will include a link to the shared document.
Note: Recommended browsers include Internet Explorer 11, current versions of Firefox, Chrome, and Safari.